Wednesday, September 16, 2009

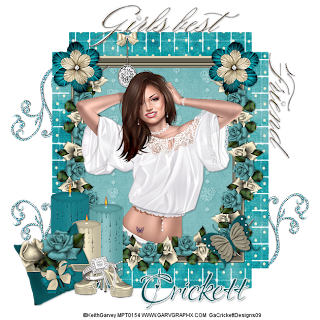
Girl's Best Friend


This tutorial was written by and created
by Crickett on September 17, 2009
Any similarity to any other tutorial is purely coincidental
This was made using PSPX2 and assumes you have knowledge working with PSP
I am using the Artwork of ©Keith Garvey
You must have license to use his work and you can get it here MPT
Supplies Needed:
Tube(s) of Choice
Mask of Choice ( I used BabesDesignz33)
Font of Choice
Scrap Kit of Choice or the one I usedDiamond Blues @ Scraps Dimensions
*If anything here belongs to you please contact me and I will either give you credit or remove it*
OK let's get started
Drop Shadow used for all
Layers V & H 1 Opacity 40 Blur 3.00
Open Frame 1 from the Kit → Shift D to duplicate → Resize by 85% 2 Times
Layers → New Raster Layer → Select inside your frame → Modify expand by 5
Copy and Paste Paper 5 into selection → Select None
Copy and Paste Bling Element 2 as a new layer →
Resize by 65% 2 Times Paste above paper layer
Change the Blend Mode to Soft Light
Copy and Paste String of Roses → Resize by 65% 2 times place at bottom of the frame →
Duplicate → Image Free Rotate 90 degrees left/right → place on the side of the Frame → Duplicate and Mirror it to make a Frame of Roses on your original Frame
Copy and Paste Tube of Choice under the Frame Layer and Above the Bling Element
→ Erase off any excess
Copy and Paste Candles, Cushion, Ring and Shoes as new layers
→ Resize by 65% then to a size appropriate for your taste
Copy and Paste any other elements of your choice from the kit
New Raster Layer → Select All → Copy and Paste Paper 6 into Selection
Load Mask from Disk
Source Luminance → Fit to Layer → Hide all Mask → Invert Transparency All Checked
Copy and Paste the Word Art from the Kit and Resize to a Size that you are happy with
Drop Shadow all layers
Add your name and copyright info
Save as JPEG or PNG
THANKS FOR TRYING MY TUTORIAL

Friday, September 11, 2009

Garv's Haunted House


This tutorial was written by and created by Crickett
on September 11, 2009
Any similarity to any other tutorial is purely coincidental
This was made using PSPX2and assumes you have knowledge working with PSP
I am using the Artwork of ©Keith Garvey
You must have license to use his work
and you can get it here MPT

Supplies Needed:
Tube of Choice
Misted Image of Choice ( Halloween)
Halloween Brushes of Choice
Word Art of Choice
Font used A & S California PlugScrap Kit of Choice or the one I used
Frighfully Halloween @
Rockin's Ruckus

Eyecandy4000 Gradient Glow
Settings:
Basic: 3/25/100
Color: Thin White


*Some elements used in this Tag I can't remember where
I got them from so you can get Creative
and use elements of your choice*


*If anything here belongs to you please contact me and I will either give you credit or remove it*
OK let's get started


Drop Shadow used for all LayersV & H 1Opacity 40Blur 3.00

New Image 650 x 650 ( You can resize later)

From the kit C/P rr_frame 2 as a new layer → Resize 85% Smart Size

Add a new layer → Select inside the frame with your magic wand → Modify

expand by 4 → Flood fill your new layer with Black

DO NOT DESELECT

C/P Misted Image under your frame layer and above the Black layer
Selections Invert → Delete off the excess → Select None → Change the Blend Mode
to Luminance (L) and lower the opacity to 65


C/P Headstone (rr_element1) as a new layer → resize to 85% or a size to your liking
Place in the bottom left corner of your tag (See tag for reference)


C/P the Skull (rr_element7) as a new layer → resize to your liking → image free
rotate right 20 degrees and place where desired (See tag for reference)


C/P the Ghost (rr_element10) as a new layer → resize by 85% twice →
place below your frame and above your misted image → Apply Eyecandy4000 with
the settings from above (See tag for reference)


This is where the Creative Part comes in....
C/P any elements of choice and place as desired


I added Brushes to separate layers for my Moon, Bats, and Misc Items I used
on the windows of the Haunted House Image


Drop Shadow all Layers with the settings from above

Add your name and copyright info

Save as JPEG or PNG
THANKS FOR TRYING MY TUTORIAL

Wednesday, September 9, 2009

Missing You


This tutorial was written by and created by Crickett
on September 9, 2009
Any similarity to any other tutorial is purely coincidental
This was made using PSPX2 and assumes you have knowledge working with PSP
I am using the Artwork of ©Keith Garvey
You must have license to use his workand you can get it hereMPT

Supplies Needed:
Tube(s) of Choice
Mask of Choice ( I used Vix Mask177)
Yvette's Template 17 You can get it
HERE
Font used Sweetheart
ScriptScrap Kit of Choice or the one I used
FM Pretty in Pink @ FantasyMoments

*If anything here belongs to you please contact me
and I will either give you credit or remove it*

OK let's get started

Drop Shadow used for all
LayersV & H 1Opacity 40Blur 3.00


Open Template->Shift D to Duplicate->Close the Original
Go to Image Canvas Size 600x600
Floodfill background layer white


Select Heart Layer ->Select All Float->Defloat
C/P Paper 17 as a new layer->Selections Invert->Delete->Select none
Delete the original layer


Select Heart Frame 1 Layer ->Select All Float->Defloat
C/P Paper 3 as a new layer->Selections Invert->Delete->Select none
Delete the original layer


Repeat the same steps with Heart Frame Top Layer

Select Rectangle 2 Layer ->Select All Float->Defloat
C/P Paper 5 as a new layer->Selections Invert->Delete->Select none
Delete the original layer


Select Rectangle 1 Layer ->Select All Float->Defloat
C/P Paper 19 as a new layer->Selections Invert->Delete->Select none
Delete the original layer


C/P any elements of your choice from the kit

Drop Shadow all layers

C/P tube of your choice and drop shadow

C/P Close Up of Tube under Rectangle 2 Frame

and above your fill layer

Add your name and copyright info

Save as JPEG or PNG

THANKS FOR TRYING MY TUTORIAL

Missing In Action

Hello Everyone,
I just wanted to let you all know that I have been MIA for the past few months due to having problems with my computer. Well now that I have it all fixed I am going to start writting Tag Tutorials again. I hope that you are all in Good Spirits and I hope to post more tuts shortly.
Thanks for standing by me.

Hugs Crickett